
For beginners, landscape photography might look as easy as shooting mountains, rivers, or the sea. But that is not all. Shooting landscape photos is a challenging task that involves a lot of preparation. Now, how does one start in this genre?
Beginners have a lot of questions when it comes to shooting landscapes. What is the best camera? What is the best lens for landscape? Is my kit lens enough? When is the best time to take a photo?
These questions are valid. But not every beginner photographer knows the answer to these queries.

What is landscape photography?
Before discussing the ins and outs of landscape photos, let us answer this fundamental question.
What is landscape photography?
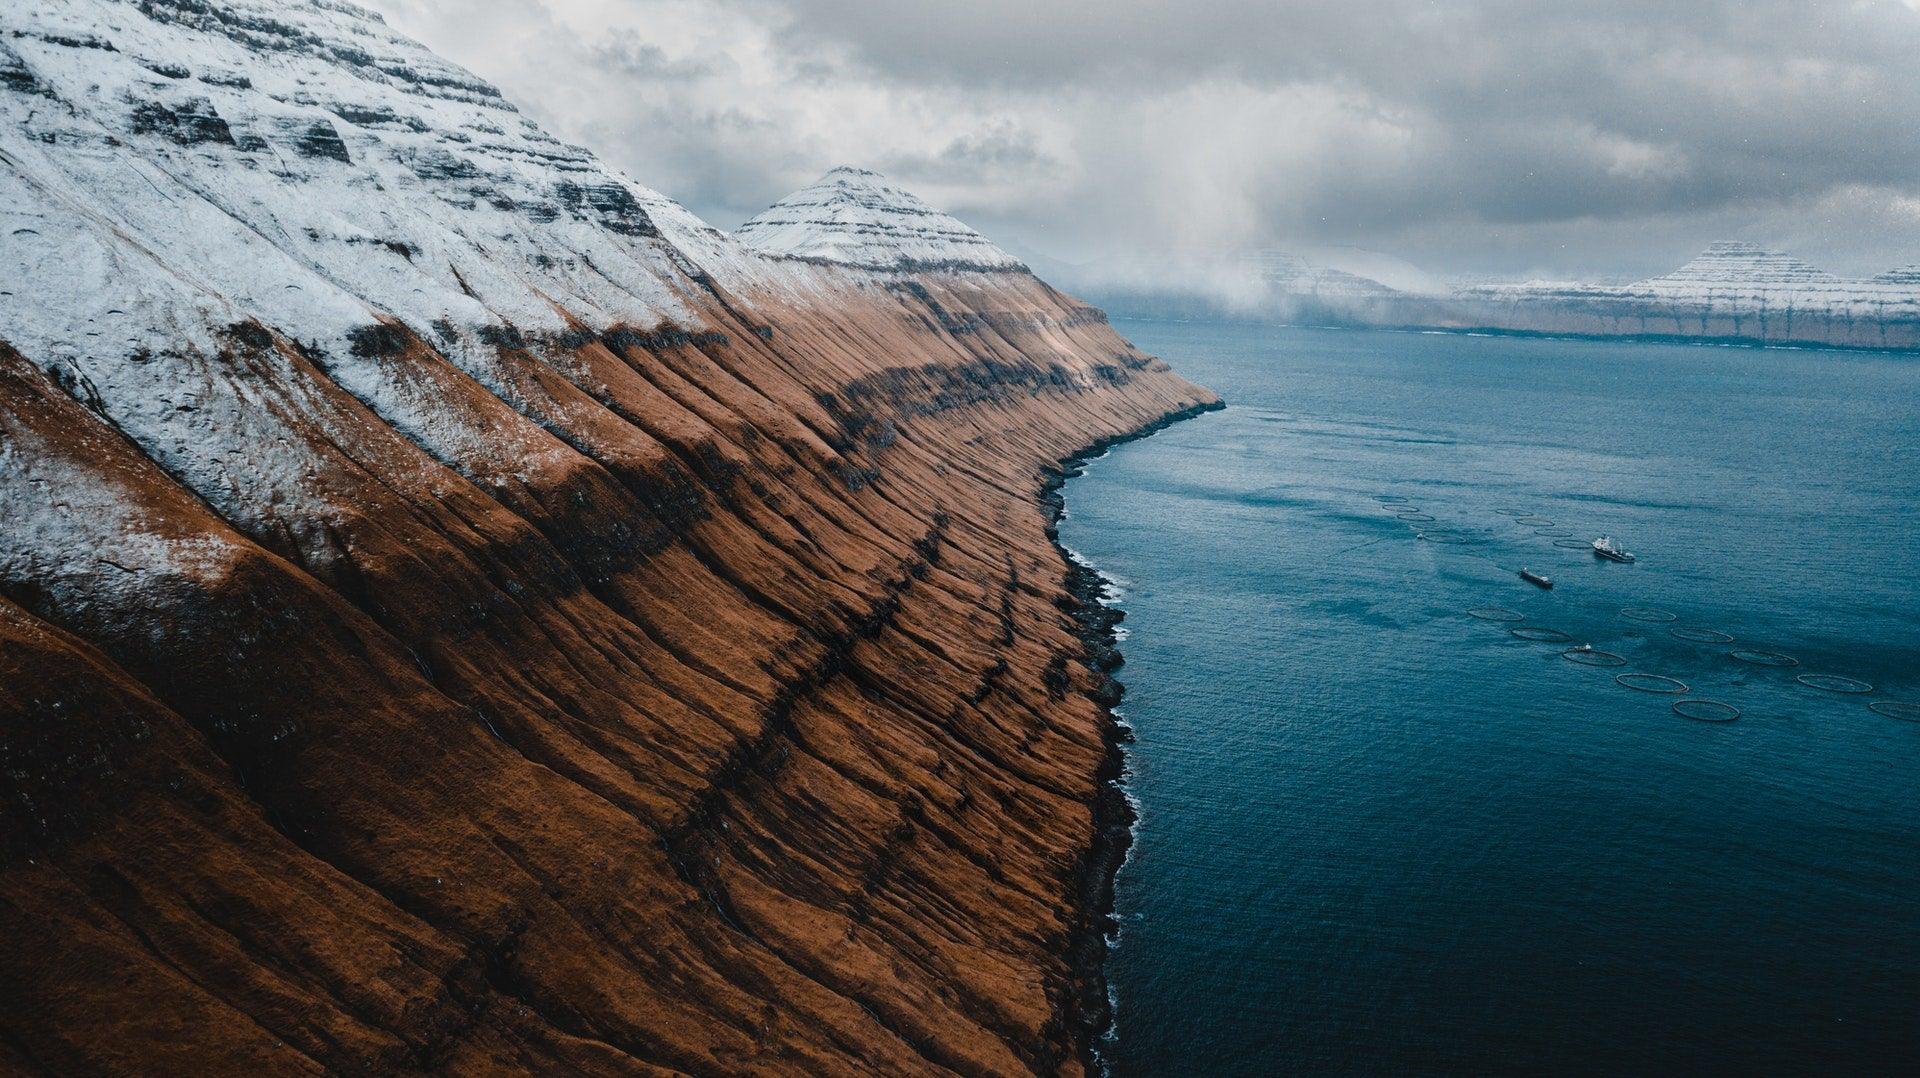
By definition, landscape photography is taking photos that “embody the spirit of the outdoors.” These images bring the “sense of being there” to the viewer. Just like street photography, landscape images convey emotions.
Landscape photos back then talk about nature and mountains. It focuses on shooting rivers, mountains, lakes, or grasslands. But as photography evolved, the definition changed as well. Modern landscapes now include land, sea, cityscapes, forest, and a whole lot more.
What is the best camera for landscape photography?
Searching for the best camera is tricky as there are a lot of great options available. Besides, landscape photography is not exclusive to expensive cameras. You can even capture a great landscape photo with your phone, but with some caveats, though.
There are several things to consider if you are on the hunt for a new landscape photography camera.
- Megapixel count
- Dynamic range
- Weather sealing
- In-camera features
- Battery life
- Lens selection
These features affect your overall experience as well as your image output. Modern cameras include features such as fast autofocus, lesser ISO noise, fast maximum shutter speeds, or even higher flash sync speeds. But these features are not necessary for this genre.
The typical landscape photo is taken at a lower ISO. The shutter speed is variable. But with a small aperture and a wide depth of field, the fast maximum shutter speed does not really matter.
With that being said, there are a few recommendations on what camera to get. If you are serious about getting the best camera for landscape photography, then here are some excellent choices. These cameras have varying features, so compare and see what works with you best.
Fujifilm GFX 100S

The Fujifilm GFX 100S is the cream of the crop when it comes to landscape photography. The GFX 100S is the best choice for shooting landscapes. The ultra-high-resolution 102-megapixel medium format sensor renders stunning images with exceptional dynamic range. Fujifilm is dedicated to producing medium format lenses, which are great for shooting landscapes.
Moreover, the Fujifilm GFX 100S has features that are helpful when shooting landscapes. It has focus peaking, focus stacking, and bracketing. If you shoot handheld regularly, the six stops image stabilization is a huge advantage.
If there is one concern regarding this camera, that is possibly the price. The GFX 100S retails for $5999 for the body alone. It is understandable that for beginners, this price range is way too high. But if you have enough budget, why not? This camera will last you years for sure.
Sony A7R IV

The Sony A7R IV is the company’s response to the demand for high-megapixel sensors. This camera has a 61-megapixel BSI CMOS sensor that renders excellent image quality. Battery life is ideal, plus there are a lot of lens choices from Sony or third-party manufacturers.
The Sony A7R IV body sells for $3500, but some retailers offer it as low as $2998. If the A7R IV is out of budget, the older Sony A7R III is still a capable camera.
Canon EOS R5

Canon is back in the game with the Canon EOS R5. This full-frame camera rectified the original EOS R. Now, it is one of the best cameras for landscape photography.
First of all, it has a 45-megapixel sensor with excellent dynamic range. The great DR is helpful when recovering highlights or shadows when shooting. Second, it has a magnesium alloy body with weather sealing. Lens choices are also great. A few years ago, this was not the case. But right now, there are a lot of Canon RF lenses available.
The EOS R5 retails for $3,899. Its little brother, the Canon EOS R6, is another excellent option for $2,499, but it has a smaller 20-megapixel sensor.
Fujifilm X-T3

For budget photographers, the Fujifilm X-T3 is one of the best bang-for-the-buck APSC cameras today. The Fujifilm X-T4 has been out for a year now. But the X-T3 is an excellent choice for its price. The X-T3 is available for $800 used, which is way lower than its original SRP.
The latest X-T4 has in-body image stabilization, a flip-out screen, and video-centric tweaks. But for photography, both cameras render the same quality. It is because both cameras use the same 26-megapixel X-Trans IV sensor.
Another great thing about the Fujifilm X-T3 is its build quality. It has a magnesium-alloy body that is weather resistant. The rugged build is more than enough for outdoor photography.
Nikon D7500

The Nikon D7500 is a capable camera for landscape photography. It is going three years old this year, but its features are more than enough for beginner landscape shooting.
It has a 20.9-megapixel APS-C CMOS sensor that is great for medium format printing. However, that is not its main selling point. The best thing about the D7500 is its price. It currently retails for less than $1000. For that, you are getting a semi-professional camera body with weather sealing.
Besides, the Nikon APS-C lens collection is vast, and you will have no problem searching for the lens for you. Third-party manufacturers also have a lot of lens choices for Nikon cameras.
Budget cameras for landscape photography
As mentioned earlier, landscape photography is all about capturing images that make the viewer feel nature. The goal is to make them “be in the moment.” It does not necessarily mean that you need a flagship camera to do that.
There are countless entry-level DSLRs or mirrorless cameras that are capable of shooting landscapes. Even the Canon EOS 600D, which came out ten years ago, is still a capable camera.
It all boils down to the shooting situation.
Most entry-level cameras do not have weather sealing. It means that dust, moisture, dirt, water may enter your camera’s internals.
If your camera does not have weather sealing, be cautious when using it in the rain, sea, desserts, or any extreme place. Exposing your camera to these types of environments may ruin it in the long run.
Entry-level cameras are better suited for casual landscape shooting, such as parks. Cityscapes and architectural photography are also incredible with these cameras.
With that being said, here are some of the budget-friendly options for landscape photography.
Fujifilm X-T2

The Fujifilm APS-C camera lineup is no slouch when it comes to photography. The Fujifilm X-T2 is not an exception. Despite being two generations behind, this camera performs well when it comes to shooting landscapes.
The 24-megapixel sensor is large enough for personal prints, and the dynamic range is excellent for recovering details. Plus, it has a weather-sealed body that can even run at -10 degrees Celsius.
The only downside with this camera is the battery life. Bring a lot of spares whenever going out for a whole day shoot.
Canon EOS 850D

The Canon 850D is also an excellent camera for landscape photography. It has a smaller sensor than the X-T4 at 24.1-megapixel. However, that is still more than enough for regular landscape shoots.
As a DSLR, the optical viewfinder is a huge plus when shooting outdoors under bright conditions. If you are not used to shooting with the viewfinder, the fully articulated screen is another advantage. It is easier to shoot at lower angles with the tilting screen.
Battery life is also superior to mirrorless cameras. Canon has rated it to last for up to 800 images.
The disadvantage comes in build quality. As an entry-level camera, it lacks a weather-sealed body. Unlike the X-T4, it cannot shoot in extreme weather conditions.
Nikon D5600

Great DSLRs do not cost much, and that is the case with the Nikon D5600. The whole camera kit costs $800, and you are good to go.
This camera features a 24.2-megapixel APS-C sensor. Nikon is known for excellent image quality, and the D5600 is not an exception. It also has a variable-angle touchscreen LCD for more accessible controls.
Bringing this camera on hikes is not a problem as it only weighs 465 grams. But that means it has no weather sealing, so be careful when shooting under the snow or in extreme heat.
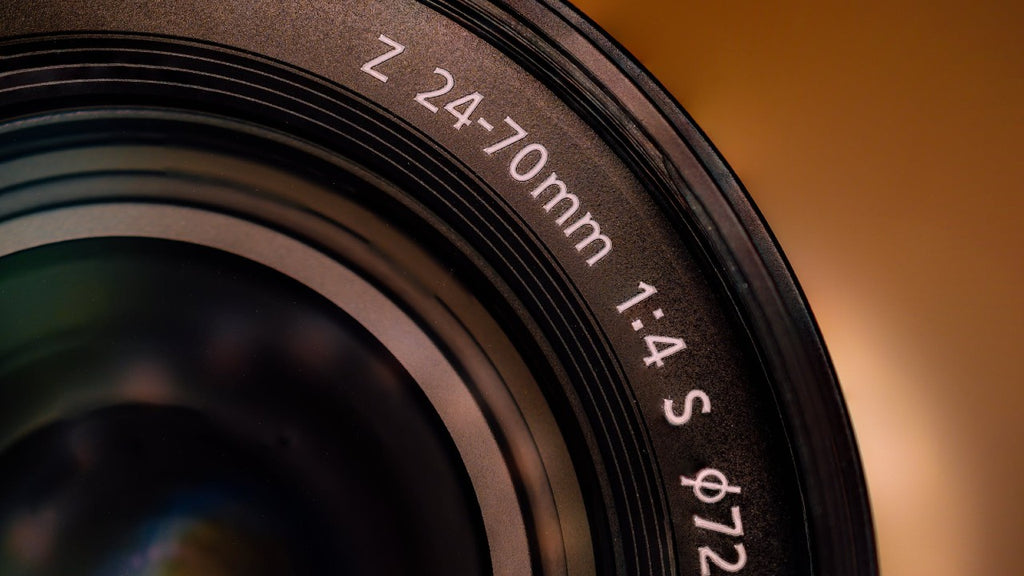
What is the best lens for landscape photography?
The best lens for landscape photography is the one you have with you. Sounds cliché, right?
To keep it simple, you can take landscape photos with any lens that you have. If you have the primary 18-55 or 16-50 kit lens from your camera, that will work. If you have a prime lens, then that will also work. Photography does not discriminate; make use of what you have.
However, the pertinent question should be, what is the ideal lens for landscape photography?
Now that is a question we can answer.
There are several factors to consider before buying a lens for landscape photography. The first would be the focal length. Next is the build quality. Lastly would be the price.
Buying a lens for landscape photography is usually narrowed down to ultrawide lenses. That is for a good reason. Ultrawide lenses can get the most of the landscape in your photograph.
The downside to this is price. The Sony 10-18mm f/4 OSS lens costs around $900. It is almost the same price as the Sony A6400 body.
There are third-party lenses such as the Samyang 12mm f/2 lens that are affordable. For $250, this lens has a wide field of view and shoots wide open at f/2. The downside is the lack of autofocus and a slight trade-off in image quality.
When it comes to aperture, having an f/2.8 lens or lower is great for shooting star trails or milky way landscapes. However, the majority of landscape images are taken with a smaller aperture. Setting the camera at f/11 - f/16 is ideal as it keeps the whole picture in focus.
Zoom vs. Prime lenses
The Samyang 12mm f/2 lens mentioned earlier has a fixed focal length. This type of lens is called a prime lens and has no zoom function. The advantage of having a prime lens is the cost. There are good ultra-wide prime lenses for less than $400.
Another plus is the weight. By having no zoom mechanism, these lenses are lighter and easier to carry around when traveling.
Meanwhile, ultrawide zoom lenses are versatile. The Sony 10-18mm f/4 is pricier, but you will have more options for focal length. The zoom range might seem limited, yet it does affect the final output significantly.
If you look closely, the aperture on zoom lenses is usually higher than prime lenses. That is another advantage of prime lenses. Manufacturers can create large aperture lenses because they do not have to worry about the zoom mechanism. They focus on the image quality of primes instead.

There are zoom lenses with a fixed aperture of f/2.8. However, the larger the aperture, the more expensive the lens is. For instance, the Canon RF 15-35mm f/2.8L lens costs around $2,300. The Sony FE 12-24mm f/2.8 GM Lens is available for $2,800 or higher.
Third-party manufacturers have cheaper options, but it still costs a lot for the average photographer. The Sigma 14-24mm f/2.8 DG DN Art Lens is an excellent substitute for the Sony 12-24mm GM lens. However, it still costs more than $1000.
When it comes to zoom lens vs. prime lens for landscape photography, the answer depends on several factors.
If you have the budget for an ultra-wide zoom lens, then you go ahead and grab one. But for budget-conscious buyers, prime lenses are a great option. The only downside is the fixed focal length. You will have to adjust your whole setup by moving forward or backward instead of zooming in and out.
Must-have camera accessories for landscape photography
Besides the camera and the lens, shooting landscapes is all about preparation. Once you are at the location, you must have all the needed camera accessories for landscape photography. You would not want to be on the spot, and you are missing a shot because you left an accessory home.
That being said, here are the best camera accessories for landscape photography that you should have.
Tripod
The most common accessory for landscape photography is the tripod. It is an essential tool to be able to shoot at slow shutter speeds and small apertures. A tripod removes camera shake and keeps the image sharp despite shooting long exposures.
If you can afford it, you are better off with a carbon fiber tripod. The weight advantage is excellent when hiking to your location.
Carbon fiber tripods also handle extreme temperatures better compared to aluminum tripods. Sometimes you may need to hike at an extremely cold or hot location. With a carbon tripod, you are confident that it will survive the whole shoot.

Tripod Head
This accessory always comes alongside a tripod. It is equally important as the tripod alone. Once the tripod is set up, you will be adjusting the tripod head most of the time.
There are several choices when it comes to tripod heads. But the ball head or the pan/tilt head is the most common when it comes to landscape photography.
Ball heads are easier to adjust. Meanwhile, pan/tilt heads have independent axis controls, which are great for precise movement.
Choosing between the two depends on your needs and preference. You need to weigh in the advantages and disadvantages of both types of heads. Either way, you can’t go wrong with both types.
L-Bracket
Using an L-bracket makes it easier to shift between landscape and portrait orientation when shooting. As soon as you compose your image, you can quickly check how it looks in portrait mode, or vice versa, without ruining the composition.
Besides, L-brackets provide extra protection to your camera. It hugs the bottom and left sides of the camera. It protects it from bumps, dings, or even drops.

Remote shutter and cable releases
When shooting landscapes with a slow shutter, even the tiniest movement can affect image sharpness. You can avoid it by using a remote shutter.
Set up your tripod, compose your image, then use the remote shutter to take the photo. It removes the need to press the shutter button, thus removing unwanted vibrations.
Lens filters
Camera filters are essential for shooting landscapes. The Circular Polarizing Filter (CPL) helps reduce reflections on a water surface. Plus, it makes the whole image look more saturated. It is useful when shooting at the beach, river, or anywhere near bodies of water.
Besides CPL, the Neutral Density (ND) Filter is also an excellent tool for landscapes. The solid ND filter reduces the amount of light entering the lens by several stops. It allows you to shoot at a slower shutter speed during daylight.
The Graduated ND Filter balances the exposure between two contrasting areas. Let’s say you are exposing for the beach, but you will overexpose the sky. The Graduated ND filter will darken the sky’s exposure and balances it for the whole image. It reduces the need for multiple exposure bracketing.
What are the best landscape photography settings?
Landscape photography has a vast scope, and it is hard to recommend one setting that works for every situation. Multiple variables should be considered, such as the time of day, location, weather condition, and a whole lot more.
- ISO - 100 (lowest possible settings in your camera)
- Aperture - f/11-f/16 (adjust accordingly depending on the lighting condition)
- Shutter speed - it depends
- You may adjust the shutter speed based on the situation and intended outcome.
- To freeze movement, you may use a fast shutter speed of 1/500 or higher, given that the lighting condition is enough.
- Slower shutter speeds are great for showing movement. You may use a shutter speed of 1/15 or slower to create the illusion of movement. Slow shutter speeds are also used to create silky waters when shooting rivers, falls, or the sea.
- White Balance - Daylight, Cloudy, Shade (it also depends on the shooting condition)
- White balance does not matter much if you are shooting RAW as it can be easily adjusted while editing. But getting the white balance right at the start makes the whole editing process quicker.
- Autofocus Mode - Single point or Multi
These are basic settings that you should take note of. These settings are not applicable in every situation yet it works as a starter as you play around your camera settings.
Understand and study depth of field
Have you seen images where only the subject is in focus? Or you have probably seen landscape photos with everything in focus?
These types of images are examples of playing with the depth of field.
Depth of Field (DoF) is the area within a photograph that is in focus. According to Stefano Caioni of Pixinfocus, “it is the distance between two points of acceptable sharpness within a photo, the space between the nearest and furthest in-focus point.”
There are two types of depth of field - narrow and large.
With a narrow DoF, only the subject is in focus. Everything that is in front or at the back of the subject would be blown out.
As you go with a larger depth of field, the subject will focus on the objects in front and back.
Here is an example of a shallow/narrow depth of field and a wide/large DoF to make it easier to understand.


As you can see in the image above, only the flower is in focus. Everything behind it is a blowout and blurry. The out-of-focus part of the image is also called the “bokeh.”
Like mentioned earlier, the focal plane is the area between two points that is in focus. It means that if another object is added beside the flower at the same distance away from the camera, it will be in focus.
The second image has a wide depth of field, almost the entire picture. Just by looking at it, you will notice that there is no blurry area. Everything from the grass on the front to the clouds above is all in focus.
What affects Depth of Field?
Three main factors are affecting the depth of field - aperture, focal length, and distance.
How aperture affects depth of field
The aperture controls the amount of light that hits the camera’s sensor. You can adjust the f-stop or the amount of light as you open and close the aperture. The aperture works similarly to the eyes—the pupil in particular.
Have you tried looking at your eyes in the mirror and shining a light indirectly on them? You will notice that the pupil goes larger or smaller depending on the amount of light that hits it. It is the same concept as the aperture.
If there is not enough light, you can make the aperture larger to increase the light. The opposite is done if there is too much light.
But if the aperture controls the amount of light, how does aperture affect the depth of field?
The smaller the aperture, the larger the depth of field would be. If you are using a wide aperture, then the depth of the field becomes smaller.
It is easy to note that a small f-stop, let’s say f/4 or lower, gives a shallow depth of field. Using f/11-16 provides a large depth of field.
If the large depth of field is essential for landscape photography? Why not use the max aperture a lens can go?
Going with the smallest aperture applicable has several downsides. But the most significant problem is a softer image.
By going with f/22, the light is now affected by diffraction. As the light enters the lens and through the aperture, it diffracts as it hits the sensor.
The rule of thumb is to use f/11 - f/16, but that is just an estimate. Each lens has its ideal aperture settings.

How focal length affects depth of field
The focal length is the angle of view and the magnification of the lens. It is measured in millimeters. But that is not the actual size of the lens.
In general, telephoto lenses or long lenses compress the subject and magnifies it. It is because telephoto lenses have a narrow-angle of view.
Check out the image above. The moon looks more prominent because it is closer to the horizon. Having the trees and the mountains as the point of reference makes it larger than usual. But besides that, a telephoto lens is used for a narrow angle of view. It compresses the image and makes everything look closer than expected.
The opposite goes for wide and ultra-wide lenses. These lenses have a wider angle of view, and the depth of field becomes larger as well.
Does distance affect the depth of field?
Another factor that contributes to the depth of field changes is the subject distance. If your subject is close, then the depth of field becomes narrow.
Landscape photographs have subjects that are very far from the camera. It is better to use a small aperture or a wide DoF to keep everything sharp.
Let’s say you will use a small aperture of f/1.8 in a landscape photograph and want to focus on the furthest mountain as your subject. All the elements in front would be blurry, not the output you want to achieve.
Also, the subject and background distance make the depth of the field more apparent. This technique is usually used in portrait photography, where a small aperture is used alongside the subject and background separation.
Why is Depth of Field important for landscape photography?
Landscape photography is all about a large depth of field. The majority, if not all, of landscape images have the whole scene in focus. That is also your goal as you venture into this genre.
Without knowing what depth of field is, you might end up with the wrong image settings.
Imagine you are at a port taking a photo of the dock with the massive sea behind. You take your time shooting photographs. When you get home, you load up the images, and you end up with photos with only a fraction of the dock in focus. The sea, clouds, and the foreground are all blown up because you have no idea that you are shooting with a narrow DoF.
Of course, you would not want that to happen. Or else, all your efforts would be wasted.
For shooting landscapes, your whole frame must be in focus. The goal is for your viewer to “be in the moment.” With everything in focus, your viewer will be more immersed in your photograph.

Landscape photography tips for beginners
Now that you know the proper cameras, lenses, and settings, you should see some landscape photography tips for beginners. Some of these techniques are technical, but it is essential to study these terms. These techniques are also the foundation of other photography genres.
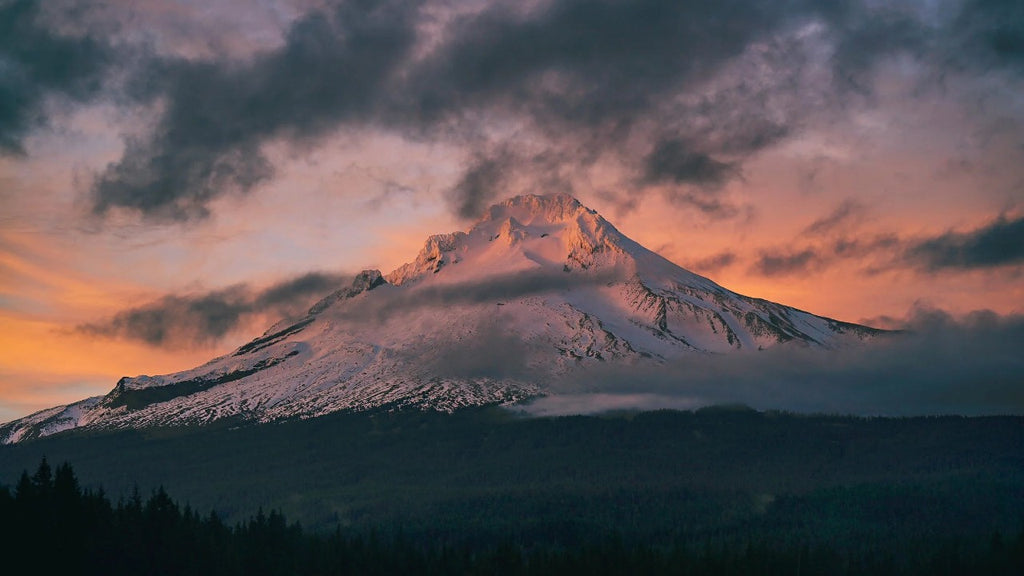
Shoot when natural light is at its best
The majority of great landscape photographs have one thing in common. They are shot during the sunrise or sunset, with the soft sun giving flattering light.
Sunset or sunrise are called “golden hours” because of the lovely golden sunlight. Whether it is for landscapes, streets, or even portraits, the golden hour helps take natural-looking images.
Shooting at noon can give harsh shadows on your photograph. This type of lighting is unflattering. However, you can still play around with your photo despite shooting at midday.
You can work around the shadows and use them to your advantage.
Practice the rule of thirds
The rule of thirds is one of the most widely used photography techniques when composing an image. It applies to every photography genre, and in landscape photography, it helps in taking an impressive shot.
Using the rule of thirds is simple and easy to apply. You compose the image using an imaginary 3 x 3 grid. You will then use the lines and intersections as a guide on where to place your subject.
In landscape photography, the horizon is often placed on the top third or bottom third. If the sky is dull, put the horizon on the top third line. If the foreground is uninteresting, line up the horizon to the third bottom line.
Placing the horizon in the middle makes an image cluttered. The output will confuse the viewer on what part they should look at. Their eyes will wander up and down, trying to find a focal point.
With the rule of thirds applied, the subject is highlighted and the significant parts of an image such as the sky.
Moreover, the rule of thirds is used alongside other photography techniques such as leading lines, diagonal lines, patterns, and framing.
There are times that you have to break the rule of thirds. But before heading in that direction, it is best to master the rule before trying to outdo it.
Maximize the use of leading lines
Using leading lines is another technique to keep your viewer’s attention. The lines formed by roads, rivers, or even the horizon are a great way to make a powerful image.
You may also use these lines to direct the attention of your viewer to your subject. Just like the image below, you may use the lines from the pathway towards the mountains (the subject).

Experiment with different point of views
Try shooting with a different angle every time. It is not wrong to practice with one point of view. However, your images will get stale in the long run.
While at the location, you may go higher at an elevated surface or lower to the ground and experiment with your composition.

How to prepare for your landscape photography shoot?
Landscape photography is all about preparation. You will miss a lot of opportunities if you are not ready.
But how do you prepare for your shoot? Is it as simple as packing everything into your bag?
Be familiar with your camera.
Just because you are shooting with a DSLR or mirrorless camera means that your images will be spectacular from the get-go. You need to spend time digging into the settings and what it can do. Play around the settings and observe the output.
The same goes for point-and-shoot cameras and smartphones. Modern smartphones have a Professional mode you can use to adjust settings manually.

Using the in-camera Landscape preset to your advantage
If you are using a point-and-shoot camera or an old smartphone, you will not have the option to adjust settings. The aperture, ISO, and shutter speed will all be determined by the device.
However, some cameras have a Landscape Mode that selects the best settings based on the situation. The camera’s processor will decide the optimal settings and image output for your shot.
Study the location
If you are shooting somewhere unfamiliar, check online if there are reviews and experiences from other photographers. Better yet, head on to the location with someone familiar with it if it is near.
You may also post on social media groups and ask for tips if you cannot go physically there. Ask for the problems they encountered and the perfect time to go. You should ask even the type of terrain so you know what attire you should wear. You won’t want to head out with regular shoes if the hike is slippery.
If you head on to the location prepared, you will have more time to focus on your composition and not worry about anything else. Doing your research may also give you ideas on angles and subjects.

Scout for lesser-known places
It is nice to head out and shoot on famous places like the Grand Canyon or the Yosemite National Park. These places have been photographed a million times already. But there are lesser-known places that could give you your best shot.
By shooting at famous places, you may end up comparing yourself to others who’ve been there before. Your composition might also be limited as you constrict yourself to compositions that others did before.
That does not mean that you need to go to secluded places. Even famous landmarks have spots that are hidden. Just grab your camera, take a walk and explore those areas.
Time to go ahead and shoot
Landscape photography is a broad genre with several techniques that are applicable. Do not restrict yourself with the tips mentioned earlier. Use it as your baseline but be free to explore.
Continue to grow as a photographer by trying new things and if you hit a hurdle, take a step back. Take a break if needed.
Lastly, it is time to go out, shoot and keep taking photographs. Of course, keep in mind these landscape photography tips. And do not forget to share your amazing photos with us here at #ProMediaGear.